

Codex for VS Code User Guide
Codex is a programming agent launched by OpenAI. In addition to the terminal CLI, it also provides a VS Code extension that allows you to chat, read files, reference context, generate modifications, and preview changes in the editor sidebar.
This article explains how to configure and use the Codex extension in VS Code through the OpenAI Responses compatible proxy of 胖狐中转. The Codex VS Code extension and Codex CLI use the same local configuration system, so simply pointing ~/.codex/config.toml to 胖狐中转 will allow Codex in VS Code to use https://api.ace.324567.xyz/v1.
First, choose an authentication method and do not mix them. This article uses
env_key = "ACEDATACLOUD_API_KEY". If you are using the CC Switch tutorial, you should let CC Switch uniformly writerequires_openai_auth = trueand~/.codex/auth.json, and do not retainenv_key. Mixing two sets of configurations is a common cause of Codex 401 errors.
¶ Application Process
To use Codex, you can first go to the 胖狐中转 Console to obtain your API Token for backup.
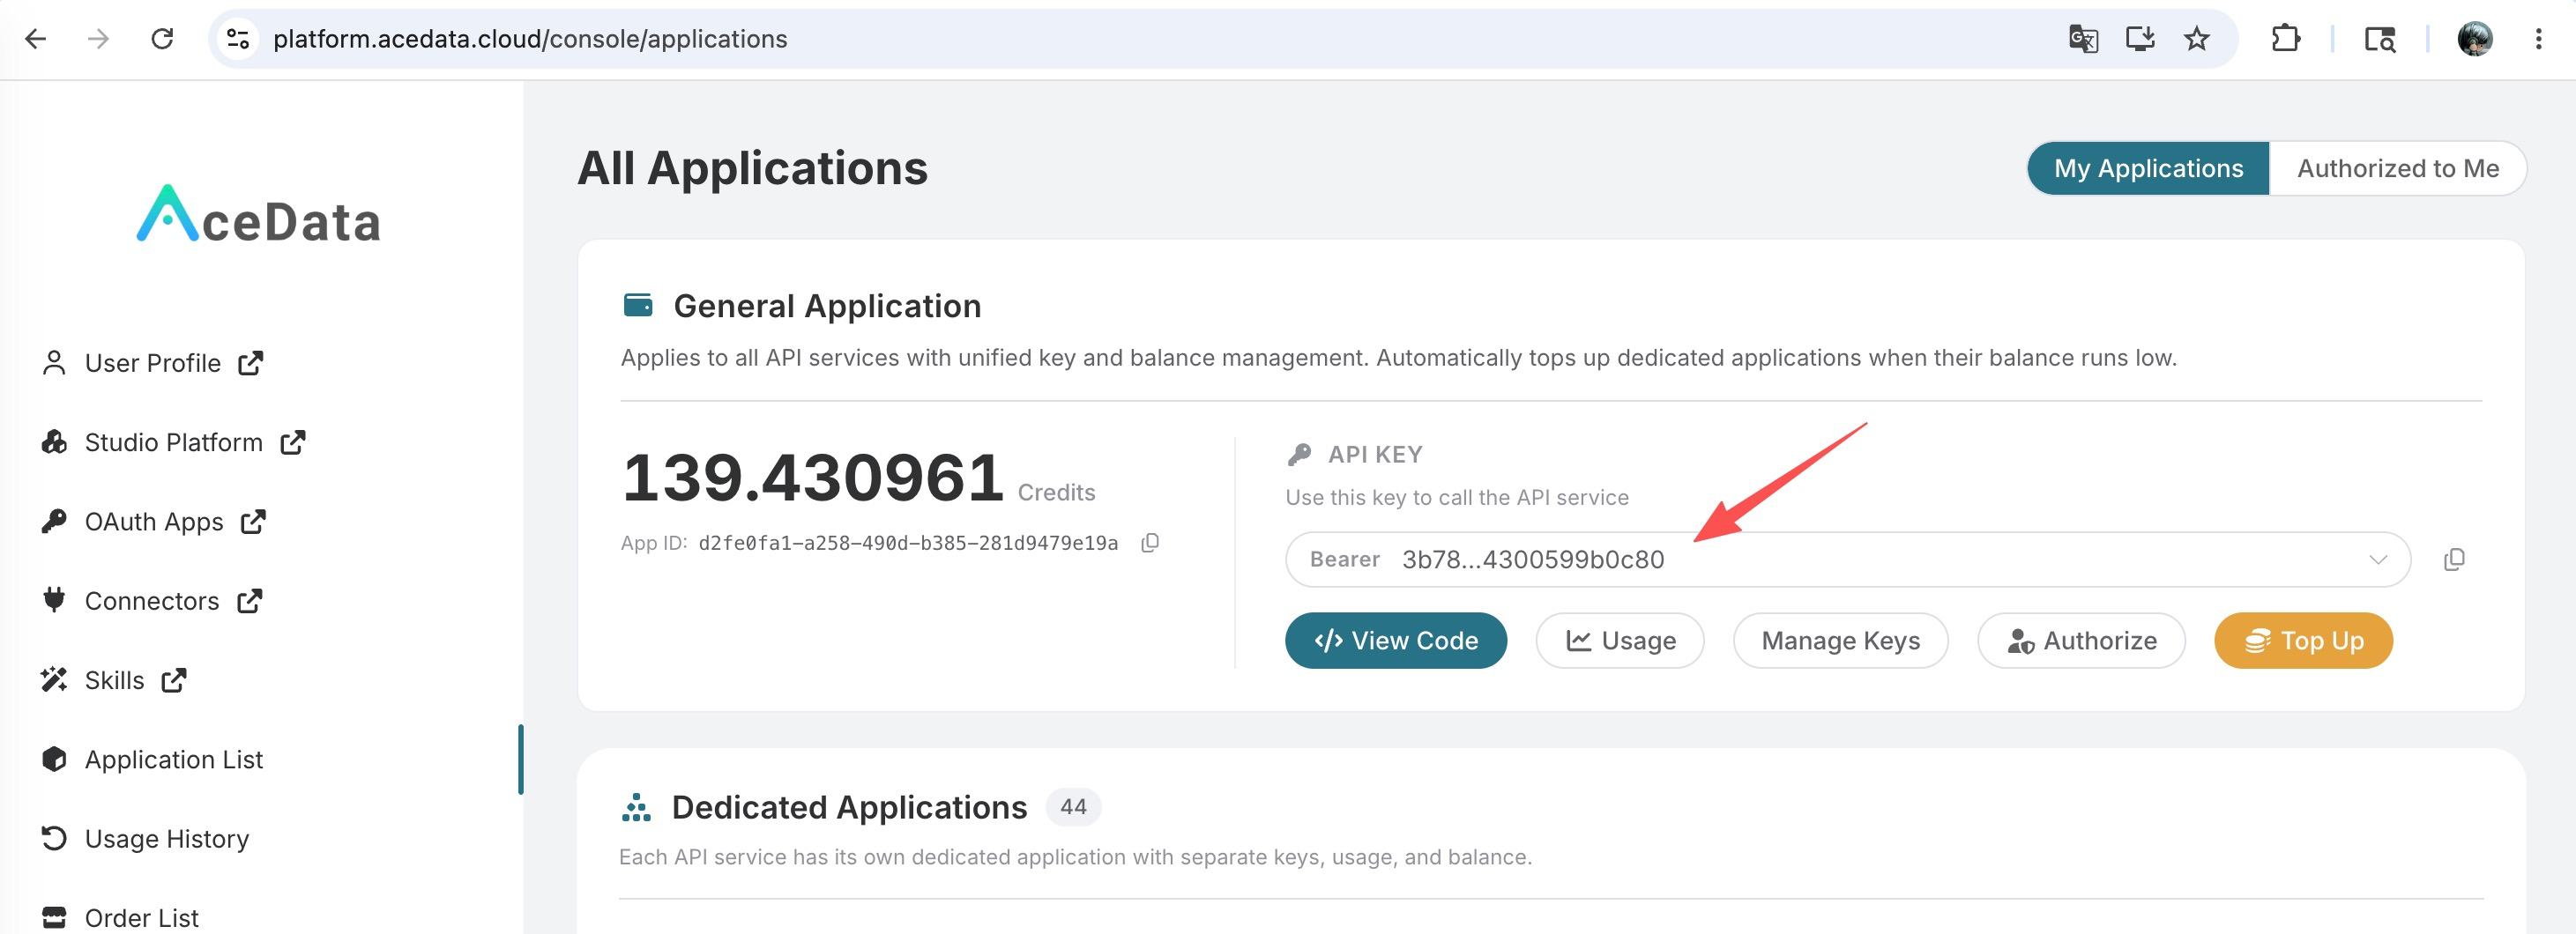
If you are not logged in or registered, you will be automatically redirected to the login page inviting you to register and log in. After logging in or registering, you will be automatically returned to the current page.
There will be a free quota offered during the first application, allowing you to experience Codex services for free.
¶ Install Codex Extension
Search for Codex in the VS Code extension marketplace and install the Codex - OpenAI's coding agent extension published by OpenAI. Its Marketplace ID is:
openai.chatgpt
You can also install it via the command line:
code --install-extension openai.chatgpt
After installation, restart or reload VS Code. If you do not see the Codex entry, you can open the command palette (macOS: Cmd+Shift+P, Windows/Linux: Ctrl+Shift+P), search for and run:
Codex: Open Codex Sidebar
Codex will appear in the right sidebar of VS Code by default. You can also drag it back to the left Activity Bar.
¶ Install Codex CLI (for verification)
The official documentation states that the Codex VS Code extension and Codex CLI use the same configuration layer. To verify whether the API Token and model are available before configuring VS Code, it is recommended to install Codex CLI simultaneously.
One of the officially recommended methods is to install via npm, requiring Node.js version 18 or higher:
npm install -g @openai/codex
macOS users can also install via Homebrew:
brew install --cask codex
After installation, check if the command is available in the terminal:
codex --version
If you only want to use the VS Code extension, you can skip the CLI verification step; you will still use the same ~/.codex/config.toml configuration.
¶ Configure 胖狐中转 API
The Codex VS Code extension and Codex CLI share the configuration file. By default, Codex will prompt you to log in to the official OpenAI account or configure the official API Key. To switch to 胖狐中转, you need to configure the API Token and ~/.codex/config.toml.
¶ Step 1: Set Environment Variables
It is recommended to write the API Token into the Shell configuration file, such as ~/.zshrc, ~/.bashrc, or ~/.bash_profile:
export ACEDATACLOUD_API_KEY="{token}"
Where {token} should be replaced with the API Token you copied from the 胖狐中转 console.
After configuring, reopen the terminal or execute the corresponding source command to make the configuration take effect immediately:
source ~/.zshrc
If VS Code is already open, please restart or reload VS Code to allow the extension to read the new environment variable.
¶ Step 2: Edit Codex Configuration File
The user-level configuration file for Codex is located at ~/.codex/config.toml. If this file does not exist, you can create it:
mkdir -p ~/.codex
touch ~/.codex/config.toml
Write the following configuration:
model_provider = "acedatacloud"
model = "gpt-5"
model_reasoning_effort = "high"
approval_policy = "on-request"
sandbox_mode = "workspace-write"

[model_providers.acedatacloud]
name = "Ace Data Cloud"
base_url = "https://api.ace.324567.xyz/v1"
env_key = "ACEDATACLOUD_API_KEY"
wire_api = "responses"
The explanations for each field are as follows:
| Field | Description |
|---|---|
model_provider |
The default model provider, corresponding to the [model_providers.acedatacloud] below |
model |
The default model ID |
model_reasoning_effort |
Reasoning intensity, common values are low, medium, high |
approval_policy |
Confirmation policy before command execution, on-request is recommended for daily use |
sandbox_mode |
Sandbox permissions when Codex executes commands, workspace-write is recommended for daily development |
base_url |
The OpenAI compatible API address of 胖狐中转 |
env_key |
The name of the environment variable from which Codex reads the API Token |
wire_api |
Protocol type, must be responses when using OpenAI Responses API |
You can also click the gear icon in the upper right corner of the Codex extension and select Codex Settings > Open config.toml to open this configuration file directly from VS Code.
¶ Project-Level Configuration
If you only want a specific project to use a different configuration, you can create a .codex/config.toml in the project root directory. Codex will prioritize reading the project-level configuration, but the project must be marked as trusted for the .codex/ configuration to load.
Example:
model = "gpt-5-mini"
model_reasoning_effort = "medium"
It is recommended to keep configurations containing personal Tokens in environment variables and not write them into the project repository. Whether to submit the project-level .codex/config.toml should also be decided based on team circumstances.
¶ Clear Cached OpenAI Login
If you have previously logged into the official OpenAI account in the Codex extension, the local official login status may still be retained. Before switching to the 胖狐中转 proxy, you can first run in the terminal:
codex logout
If the command is unavailable, you can also delete the local cache file:
rm -f ~/.codex/auth.json
Then restart or reload VS Code.
¶ Basic Usage
After configuration is complete, open the Codex panel on the left or right side of VS Code and directly input your request. For example:
Explain the directory structure of the current project and point out the main entry file.
The Codex extension can combine files and selected code in the editor as context. You can also reference files in the input box using @, for example:
Refer to @src/App.vue and help me break this page into clearer components.
If you select a piece of code, you can run the command from the command palette:
Codex: Add to Codex Thread
You can also run:
Codex: Add File to Codex Thread
Add the entire current file to the context.
¶ Switch Model and Reasoning Effort
The Codex VS Code extension supports switching models in the model switcher below the input box and adjusting reasoning effort. When using 胖狐中转 custom providers, the safest way is to first write the default model in ~/.codex/config.toml, and then switch in the interface as needed. It is recommended to use the following defaults:
| Scenario | Recommended Model | Reasoning Effort |
|---|---|---|
| Daily code reading and minor modifications | gpt-5-mini |
medium |
| General development tasks | gpt-5 |
high |
| Complex refactoring and deep reasoning | gpt-5.5 or gpt-5.5-pro |
high |
| Reasoning enhancement tasks | o3 |
high |
If the model you want is not displayed in the interface, you can directly modify the model field in ~/.codex/config.toml, and then restart or reload VS Code. A complete list of models can be found in the 胖狐中转 OpenAI service documentation.
¶ Choose Work Mode
The Codex extension supports different work modes. Common modes are as follows:
| Mode | Applicable Scenarios |
|---|---|
Chat |
Just want to discuss, explain code, plan first, and do not want Codex to modify files directly |
Agent |
Let Codex read files, modify code, run necessary commands, recommended for daily development |
Agent (Full Access) |
Allows higher permissions and network access, suitable for scenarios where you are aware of the risks |
It is generally recommended to use Agent and keep approval_policy = "on-request". This way, Codex will ask for confirmation before executing sensitive commands, accessing paths outside the workspace, or the network.
¶ Verify Configuration
You can first verify whether Codex can work through 胖狐中转 using the same configuration in the terminal:
codex exec --model gpt-5-mini "Reply with exactly: ADC_Codex_OK" < /dev/null
If the configuration is correct, you should see a response like:
ADC_Codex_OK
If you receive a 401 here, please first confirm: model_provider matches [model_providers.<name>] exactly; VS Code is started from a parent process with ACEDATACLOUD_API_KEY; ~/.codex/auth.json is not mixed with the env_key scheme of this tutorial. Do not add non-standard headers like X-Provider to override. After making corrections, you must completely exit and restart VS Code; simply closing the panel may not refresh the process environment.
Then return to VS Code, open the Codex panel, and enter a simple question:
Explain the purpose of the current workspace in one sentence.
You can also check request records and billing details through the 胖狐中转 Console - Usage History and view remaining quotas through the 胖狐中转 Console - Application List.
¶ How It Works
The Codex VS Code extension is not an independent set of model configurations. It uses the native Codex CLI and shares the configuration layer of Codex:
- The VS Code extension starts Codex and reads the user-level
~/.codex/config.toml. - If the current project is trusted and there is a
.codex/config.tomlin the project, Codex will load the project-level configuration. - When
model_providerpoints toacedatacloud, Codex reads the API Token fromACEDATACLOUD_API_KEY. - Requests are sent to
https://api.ace.324567.xyz/v1/responsesvia the OpenAI Responses protocol. - 胖狐中转 verifies identity, checks quotas, forwards requests, and records usage.
Therefore, the terminal CLI and VS Code extension usually only need to be configured once. After you verify in the terminal, the VS Code extension will also use the same configuration.